


Sorry for my absence; I just moved back to Oregon and was very busy packing and wrapping things up! There is (probably) only 1 more summer of skirts post after this one, as summer is sadly coming to an end.
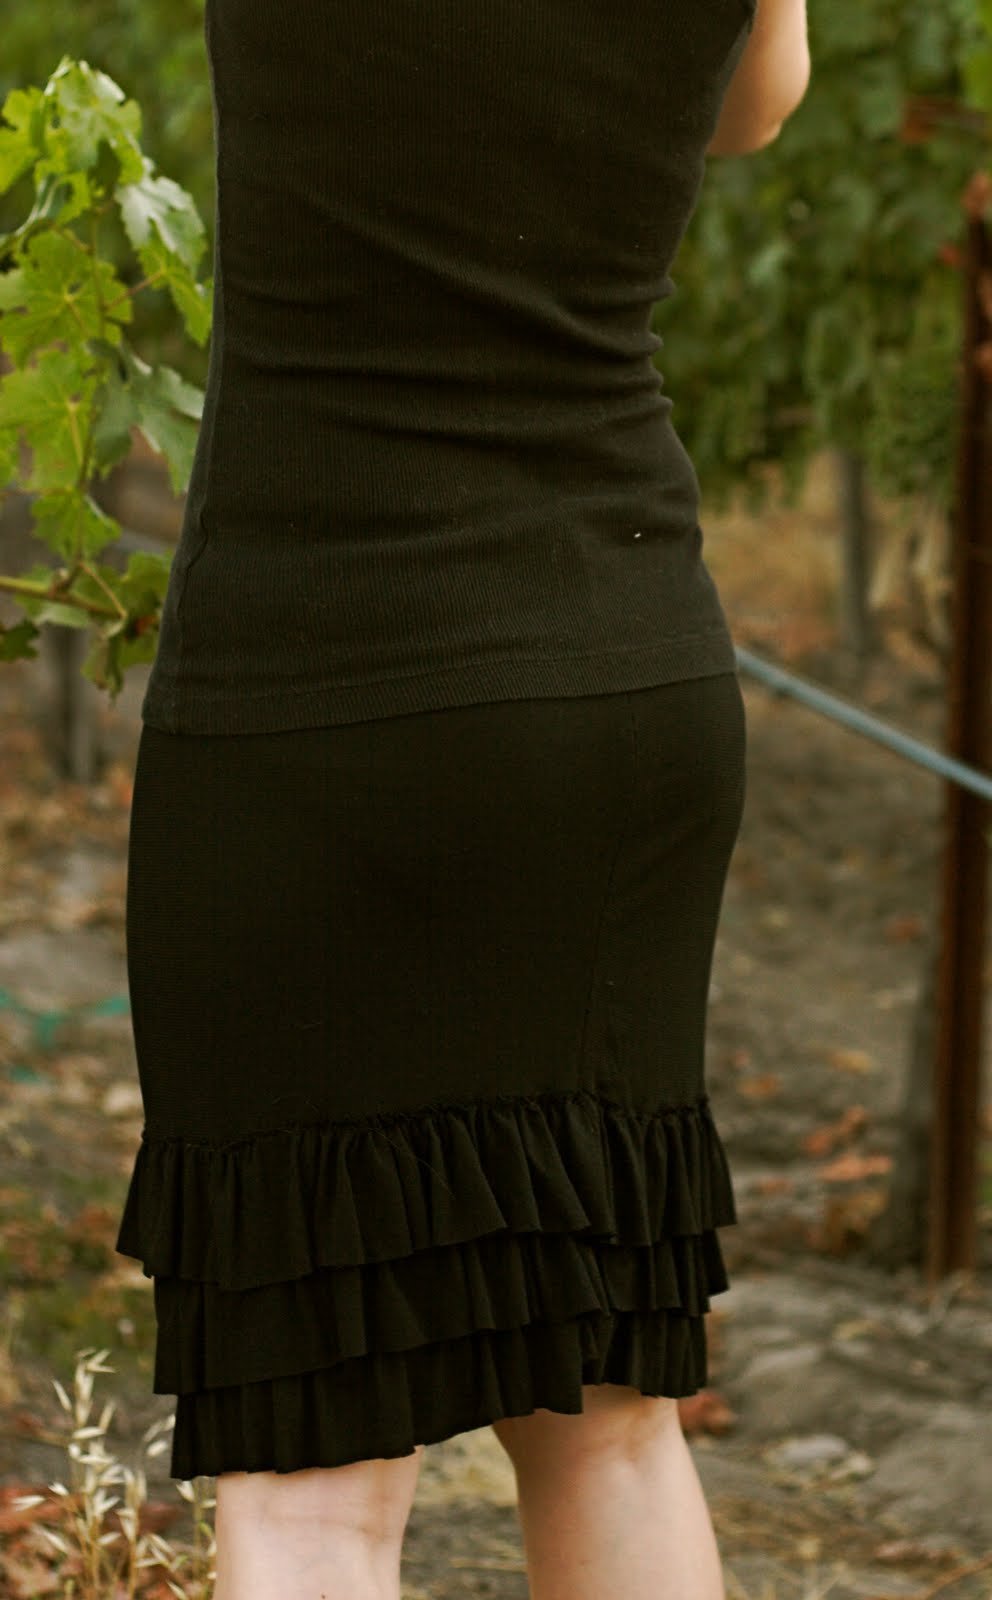
This skirt is quite similar to the blue ruffle skirt as far as construction goes, but it is simpler and has a very different look to it! I thought it looked like a mix between a pencil skirt and a flamenco skirt, and then I realized it reminded me of a salsa dancing skirt! Hence the name :)
What you need:
- About a yard of knit fabric, depending on your size (see step 1 for details).
I made this skirt have a half lining to it because the knit was so thin. So, I had extra fabric along the inside.
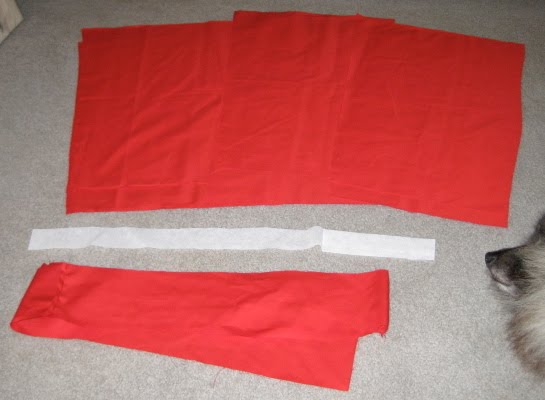
Step 1: Measure around the widest part of your hips. Add 2 to that measurement. This is w. Also, measure how long you want the skirt to be, and how long you want the extra lining material to be - usually just enough to cover your rear is good- and add it to itself. This is L. Next, cut out three strips measuring 2 inches by w.
I'm sorry I didn't get pictures of this part. If you have questions let me know!
Step 2: Mark where your length measurement of the skirt ends (so you should have a mark between the extra lining fabric you added and the actual length you want your skirt to be). Fold the fabric at that point, so you wind up with a fold at the waistband, the normal skirt on one side, and the lining part on the other. Do this on both pieces of fabric, and then pin them together so the lining part is on the OUTSIDE.
Step 3: You might want to curve the top of the skirt, depending on where you want your skirt to sit. I wanted mine to sit on my waist, so I curved it along the hips a bit - with the lining still pinned and the skirt folded (because you'll want the lining curved as well). If you need help with this, go here. Now, simply sew the sides together on your two pieces of fabric, and you'll wind up with your main skirt piece. Now turn the skirt right side out, and you're onto the ruffles!
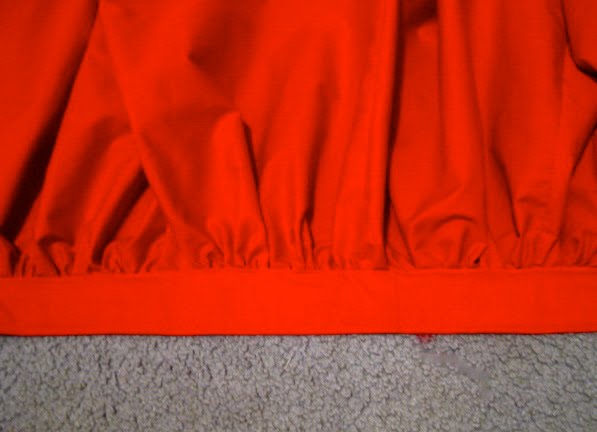
Step 4: Gather each of the three ruffles. Pin the first one to the bottom of the skirt, so the edge lines up with the bottom of the skirt. Sew it on!
 Step 5: Repeat with each of the other ruffles, laying each on top of the previous one so that the seam is covered. I just had my top ruffle's raw edge exposed, but if you don't like that you can do the following:
Sew the top ruffle on about an inch above the second one, put facing the opposite direction. Then, press it down flat over the other ruffles, the way it's supposed to be. This will hide the seam. You may need to do a topstich over the ruffle though, as it may poof out a bit.
Ta da!! Time for salsa dance lessons!
 ]
]


