Tuesday, July 27, 2010

Summer of Skirts - Anthropologie ruffle pencil skirt tutorial!


Eeek, I'm late. So sorry!

As I said before, no original summer of skirts post this week, but only because I have some AMAZING ones coming up and am just waiting for some equally amazing pictures! I'm still giving you guys a tutorial though - and an awesome one at that.


Check out Communing with Fabric's anthropologie skirt tutorial!

When I saw this tutorial, I knew I had to share it with you guys- I thought it was an impressive undertaking, and turns out well! I am so bad at pattern drafting - I cut first and think later. So it's good for me to have some master pattern-drafters featured here, I think :)


Next weekend, check back for a tutorial for this beautiful thing:


And if I do say so myself, my version turned out pretty wonderfully. And it was very easy!!

Sunday, July 25, 2010

Red Skirt Giveaway Winner - and more!


Thank you all for entering the red skirt giveaway! The winner this time is Jenn from WestSacHoney. Congrats to Jenn!

Keep checking the Giveaways page - I have an awesome, awesome shirt I'll be giving away soon. I'll probably start the giveaway next weekend, after I have some pictures taken of it!

Also, here is a picture of Allie (who won the dorothy dress giveaway) in her dress - isn't it cute on her??


Finally, one last thing - I was contacted by the website Giveaway Scout. They wanted me to add my blog! Giveaway Scout is an awesome site - here's what they say about themselves:

"Giveaway Scout is a giveaway search engine. Our users subscribe to receive updates on the latest giveaways on the web. Add your blog and your giveaways will be exposed to our large network or users."

If anyone is interested in entering their blog on this awesome site, visit here !

Wednesday, July 21, 2010

Red Skirt Giveaway -Ending soon!

My current giveaway will be ending this Saturday at midnight, and the winner will be announced on Sunday!

Enter while you can :)

Sunday, July 18, 2010

Up and coming tutorials!!!


Ok, I have some AMAZING things coming up!! I am so excited, I just have to let you know what I'm working on!

First, some bad news - I won't be posting a summer of skirts tutorial next weekend. The good news is that I will still feature someone's skirt tutorial next weekend, and also I have some really cool skirt tutorials coming up! The reason why there's not tutorial next weekend is because I'm waiting until my photographer is here to get some good pictures for you.


First, there's this skirt:

I got such a big response from this when I posted it, that I realized I had to make it! I've been looking for just the right fabric for it every since, and I just found some yesterday! I'm so excited :) This tutorial should be out in a couple weeks.


And here's another skirt I already made - it's pretty awesome and is a bit of a cross between these two skirts (I'll let your imagination try to figure it out!):


I also have a couple other shirt and dress tutorials coming up - one of which will turn into a giveaway!

And I've saved the best for last.... I made a convertible/infinity dress! You know, those awesome knit dresses that can be worn a million different ways? Take about the most versatile little black dress! I will be giving you a tutorial on that soon (also as soon as I get some pictures taken!) Here's an example (from the Butter by Nadia collection - she's amazing!) of some ways this dress can be work. Worried about being able to duplicate these? Don't worry - there are tons of videos on youtube that walk you through it!


Saturday, July 17, 2010

Summer of Skirts - Men's Dress Shirt Refashion Tutorial


I've been noticing that there are a lot of skirts right now that look like they were made from button down shirts, and it gave me an idea. I had a skirt from my grandpa that was a really nice light cotton, and I thought it'd be perfect for a skirt! Here's some of the pictures that inspired me - and might give you some ideas!


I decided to keep my buttons in the back though - although the skirt could pretty much go either way! There was a placket that went over the buttons on this shirt, so the buttons wouldn't be exposed anyway. This tutorial is going to be really simple, because it is pretty much the same thing as the red bow skirt.

What you need:

- A men's dress shirt (or a woman's - it depends on how big or how long you want your skirt to be)
-Interfacing for the waistband

Step one: Cut the collar and sleeves off of the shirt. Decide how long you want your skirt to be, and trim the shirt down from the top (so you can keep the hem on the bottom of the shirt). Trim the sides so they smoothly go up to the top in one line.


Step Two: Follow steps here to complete the rest of the skirt, but omit the zipper.

There are three options for this skirt: Have the tie and buttons in the back, like I did, have the tie and buttons in front, or have the buttons in front and the tie in back. If you do this last option, you'll need to add a zipper - the buttons are what allow you to put the skirt on and off without a zipper!


So go hit the thrift store and find some awesome men's shirts, and if you make one I'd love it if you send me the picture or link! If I get pictures I'll post them with a link back to you :)

Also - my camera died and I lost the charger, so I'm borrowing my roommates camera which I obviously don't know how to use... I don't know why my background is in focus and I'm not! So sorry about the blown out pictures.


Wednesday, July 14, 2010

"Aphrodite" - Greek Goddess Shirt Tutorial!


Ok, I have to warn you. I'm kind of on a grecian kick. I've always loved it when fashion infuses the 'ancient greek' look, but this summer the one-shoulder trend has taken off and really inspired me. Also, I scored a ton of poly-mesh fabric at the store for $2.50 a yard, and it lends itself perfectly to this type of thing.

So, you have some major tutorials to look forward to... I've already made several things - one of which will be an awesome giveaway - and have tutorials almost ready to go. However, I will be waiting to post them for a couple weeks, because I'll be seeing my photographer briefly and am hoping to squeeze in a photo shoot :)


What you need:
-
A square of knit (stretchy) fabric
- an extra strip of fabric - about 1 inch by 6 inches
- 2 shank buttons (optional, but definitely more fun with)

First, some measurements. Measure your shoulders, and add 10 inches (or more!! This will give you longer flowy sleeve things). That will be the width of your fabric square Then measure from your shoulders to the desired length of your shirt. Add a couple inches to that, and that will be the length of your fabric square.


Step 1: Put a two pins in the top (the width side) of your fabric, about where you think your shoulders wil go. Try it on, putting your head in between the two pins, and adjust as needed.


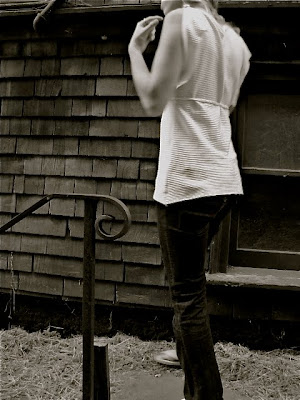
It's hard to see the pins in these pictures, I know. But basically, you should be able to put it on like this:

Step 2: Stitch your fabric together where the pins are - about an inch of a seam.
Then, put it back on and pin it down the sides to your body. You probably don't want it super tight or super loose - somewhere in between is good. You want to make sure you pin beginning beneath the armpit where it will be comfortable for the shirt to be sewn together.

Step 3: Then, take it off and lay it down. Here's the the tricky part .Trim about an inch away from the pins along your shirt, until you get to the topmost pin. At this point, look carefully at the picture below. You want to cut at an angel (about 45 degrees, if that helps) back away from the armpit to the edge of the fabric.

I know the picture is bad, so here's a little drawing that might help clarify (but is equally bad). The gold line is the fabric, the red is the pins (yours will probably not be a straight line though and will probably be more curved), and the black is the line to cut on.

Step 4: Turn your shirt right side out. Now, it's time to add the buttons. Grab a little sliver scrap of fabric - preferably the one you're using, and it has to be a stretchy knit or something. Thread it through the button hole (this is why you need shank buttons).


Step 5: Tie the fabric around the shoulder seams you made, bunching them up. If this doesn't make sense, look at the finished pictures below and it should be more clear.


Step 6: Now, there are two ways to do this next part. One involves sewing, one doesn't... i'd recommend the sewing method, but either way works.

Try your shirt on and decide how low you want the neckline to be. Take it off and fold it in half (only the front part, let the back part just hang out) with the shoulder buttons lining up. Put a pin along the fold (the middle) about an inch below where you decided you want your neckline to hit.


Method 1: Very carefully make a little slit in the fabric there. Make sure it's small! Then, thread your extra strip of fabric through the hole (through the front of the fabric). One end should wind up on the inside of the shirt. Take the other end and look it around the neckline, pulling the neckline down. Then tie the two ends together tightly (they should both be on the inside of the shirt now). If your fabric stretches too much you might be able to see the whole - either put fray check on it or stitch it closed.


Method 2: Pin the extra strip to the front of your fabric about an inch lower than you want your shirt to go. Have the long end going down towards the bottom of your shirt, and the short end facing the neckline of your shirt.

It should look like this: (note, I did the first method first, then decided i wanted a lower neckline so I redid it like this)

Then my camera died, so I don't have any pictures of this next part. But you pretty much just do the same thing, take the long end, pull it up over the neckline, and into the inside of the shirt. Then, making sure your thread is the same color as the shirt, pull it tight and sew it down on the inside of the shirt, right near where it's sewed to the front on the other side. Does this make sense? If not, post a comment and I'll clarify! Looking a the pictures below should make it make more sense as well.


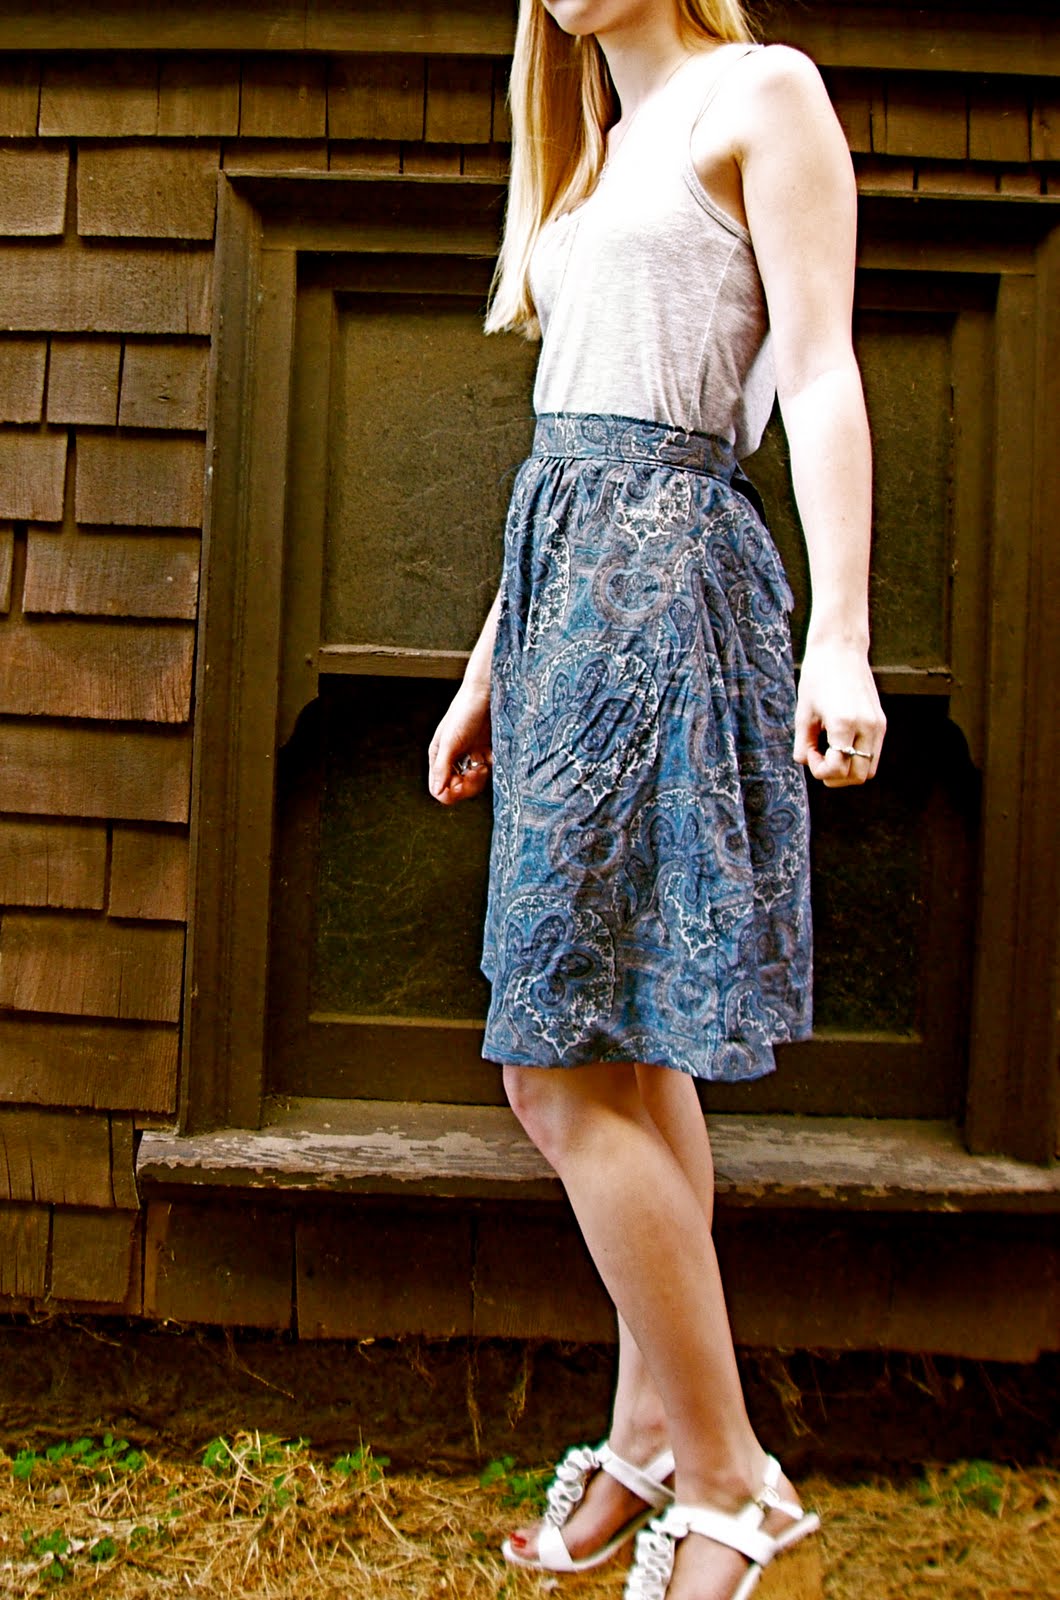
I also added a belt - it's the one I made for my Cabo dress out of an old T-shirt, and is super comfy because it stretches. For the tutorial, check here; I think it's linked from that post.


Monday, July 12, 2010

New Look!

It was time for a change... what do you guys think?

Sunday, July 11, 2010

Summer of Skirts - Pencil Skirt


Since I'm cheating this time, I thought I'd cheat twice so we can have something for the grown ups too. I was going to do a pencil skirt tutorial, but then I saw this amazing one through sewing.craftgossip.com. By the way, if you've never been there, you're missing out big time.

Anyway, here's the awesome tutorial on drafting a pencil skirt pattern!

Summer of Skirts - Ruffled Skirt Tutorial for little girls!


I'm cheating this week. I won't be posting my own tutorial this week, but will instead be featuring someone else's. I'm doing this for 3 reasons: 1. My skirt for this week flopped (bummer...), 2. I have no kids and therefore no projects for them, but I know that those of you with kids are probably interested in making something for your little girls, and 3. This skirt is adorable. Seriously, it makes me want to procreate immediately.


Also, give me feedback - do you guys want to see more child - sized stuff? Because I have seen a ton of really, really adorable tutorials for little girls lately that I would be more than happy to share with you! Just say the word and they're yours :)

Friday, July 9, 2010

Tank Dress Tutorial


Here it is finally - the tank dress tutorial I've been promising! Thanks to one of my lovely followers who gave me a little kick in the seat when she asked if I was still planning on posting this! Sorry it took me so long... It's been written for a while.

Also, don't forget to enter the Red Skirt Giveaway!

Anyway, here is the tutorial - enjoy!


What you need:
- 1 yard cotton fabric
- A ribbed tank to pin your size
- 2" wide elastic - enough to fit comfortably around your waist


Step 1: Make the skirt. You can make it really easy (like I did with this blue on) and make a straight forward skirt, or you can make an A-Line shape which isn't much harder but I think gives it a better shape (The pink and brown dress has an a-line skirt). Whichever you want, click on the appropriate link and follow the instructions up the the point where you start the elastic casing, then stop.


Step 2: Try on your tank top and decide where you want it to end and your dress to begin. Mark it, and cut about an inch below that across. Be VERY careful - it will look funny if it's crooked!

Also cut your elastic if you need to - it really depends on what your comfort level is. You might want it a little tighter, or you might want it to barely stretch. Whatever works for you!


Step 3: This is optional. Depending on the length of your elastic and width of your skirt, you may need to gather the skirt. Stretch your elastic as far as it can go. Can it stretch as long as your skirt is wide? If not, you're going to have to gather the skirt a little.

Run a gathering stitch all along your skirt - the end you want to attach to the waistline, not the hemmed edge. Now, gather it so that your elastic reaches all the way around it when stretched.


Step 4: I didn't need to gather mine, so I jumped right to this step. Now, technically you should probably pin the skirt to the elastic. But since you'll have to stretch the elastic while you're sewing it, it would be difficult to pin it in the right spot. I'll leave it up to you; if you don't pin it you'll have to be very careful that you're stretching the elastic the right amount as you sew.

Sew the skirt to the elastic, with the raw edge of the skirt behind the elastic. This shows me sewing it from the back end, but it usually looks better if you flip it over and sew along the elastic. It is harder to make sure your fabric is being attached that way, though.

As you sew, you'll need to stretch the elastic (how much depends on how your skirt matches up to it; this is something you'll need to figure out before hand and approximate). This can be a little tricky at first, because it will try to move around when you do this. Just go slow, hold the elastic firmly in place, and don't get discouraged!


This is how I hold/stretch the elastic to keep it from moving around too much. Holding it taut in the back helps a lot!


As you sew, the elastic will pop back to normal behind you and the skirt will be gathered up.


Step 5: Once you get all the way around, leave a little bit of elastic to overlap the beginning of the elastic. Do a tight zig zag (set your stitch width to a high setting and your length low) down the overlapped elastic to secure it.


Step 5: Next, draw a line on the tank top where you want your elastic to hit. Pin the elastic and skirt carefully to the tanktop so that the seam in the elastic faces the back of your dress. You may need to stretch the tank top or the elastic a little bit, but it shouldn't be nearly as much as the previous step.

Now just sew! It definitely is a good thing to stretch these as your sewing - the top and elastic should still line up in the same place,

You can also add ruffles, pleats, or whatever embellishment you want to the top of the dress using your left over tank top fabric! Here is the one with the A-line skirt:


Any questions? Leave a comment!

LinkWithin

Related Posts with Thumbnails